
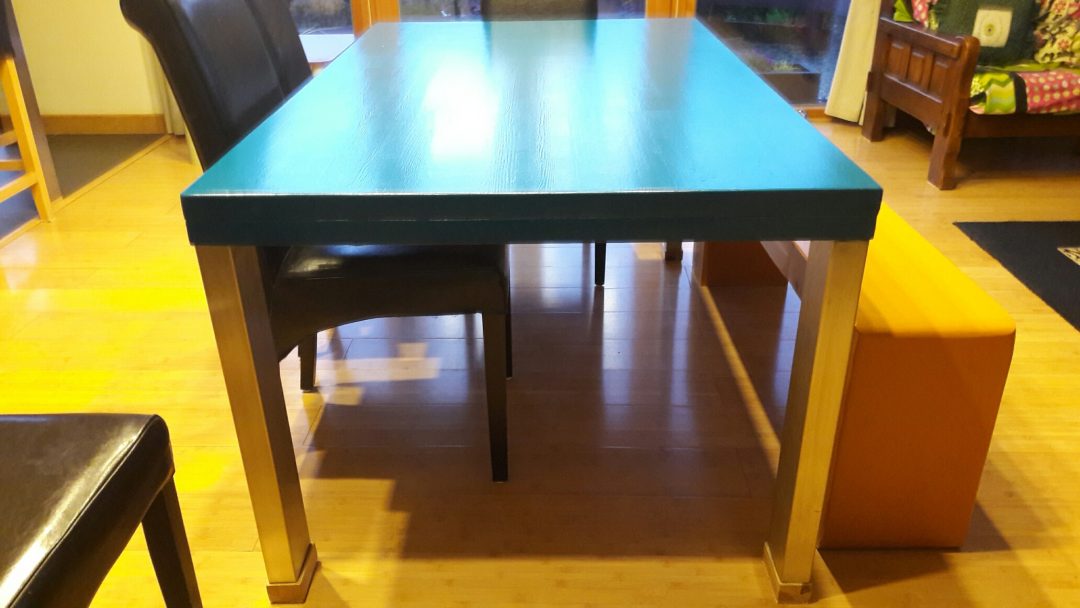
Our new dining table
This particular project came about because we bought an awful looking dining table when we first moved into our house. It did the job fine but was aesthetically obnoxious… at least to some of us less involved in the purchase.
The table sat there and gnawed at our inner peace of mind until one day someone snapped and put it up for sale. It sold quickly – probably because we underpriced it – and so we had some recovered cash to go again. I figured I would set myself the goal of making our own one how we wanted it, and to stick to the budget we recovered. (250 euros).
This project didn’t involve any reuse of materials due to the kind of design we opted for.
The top surface used some basic 38mm pine-board ordered online from these guys (www.strahan.ie).
We preferred a clean simple design with little more than a surface and 4 legs positioned at the very corners to allow for maximum legroom. I figured at that thickness the table top span we had in mind would not require additional cross supports other than the 4 table legs at the corners.
In order to match countertop legs we had elsewhere in the room where this table would stay, we opted for a box stainless steel leg design as shown below. Apart from being very resilient, the box steel gives a modern clean look and should stand up well to repeated assaults from our kids.
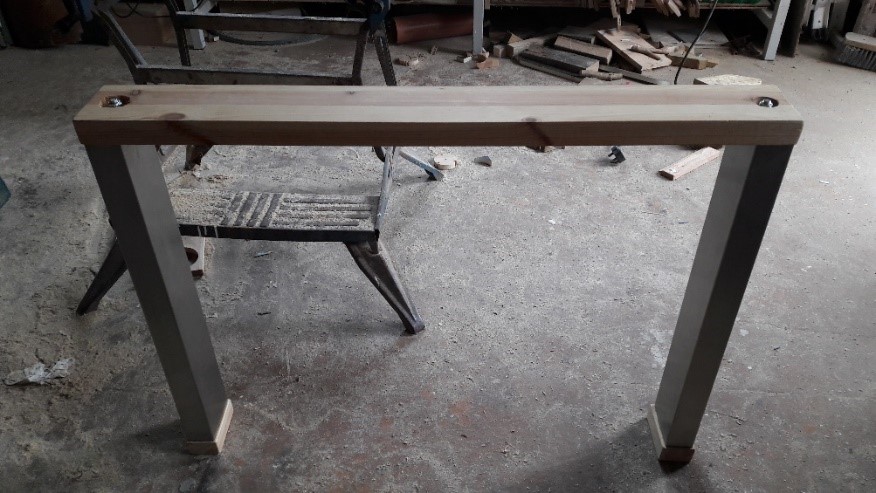
The lower end of the legs used a timber foot to soften the look and also to ensure the bare steel wasn’t in contact with the floor. Mechanically, the foot acts as the fixing point for a threaded steel rod running the length of each leg and attaching to the upper timber cross-piece. The end of the rod is threaded through this foot and secured with an anti-slip nut. Thus the two legs were 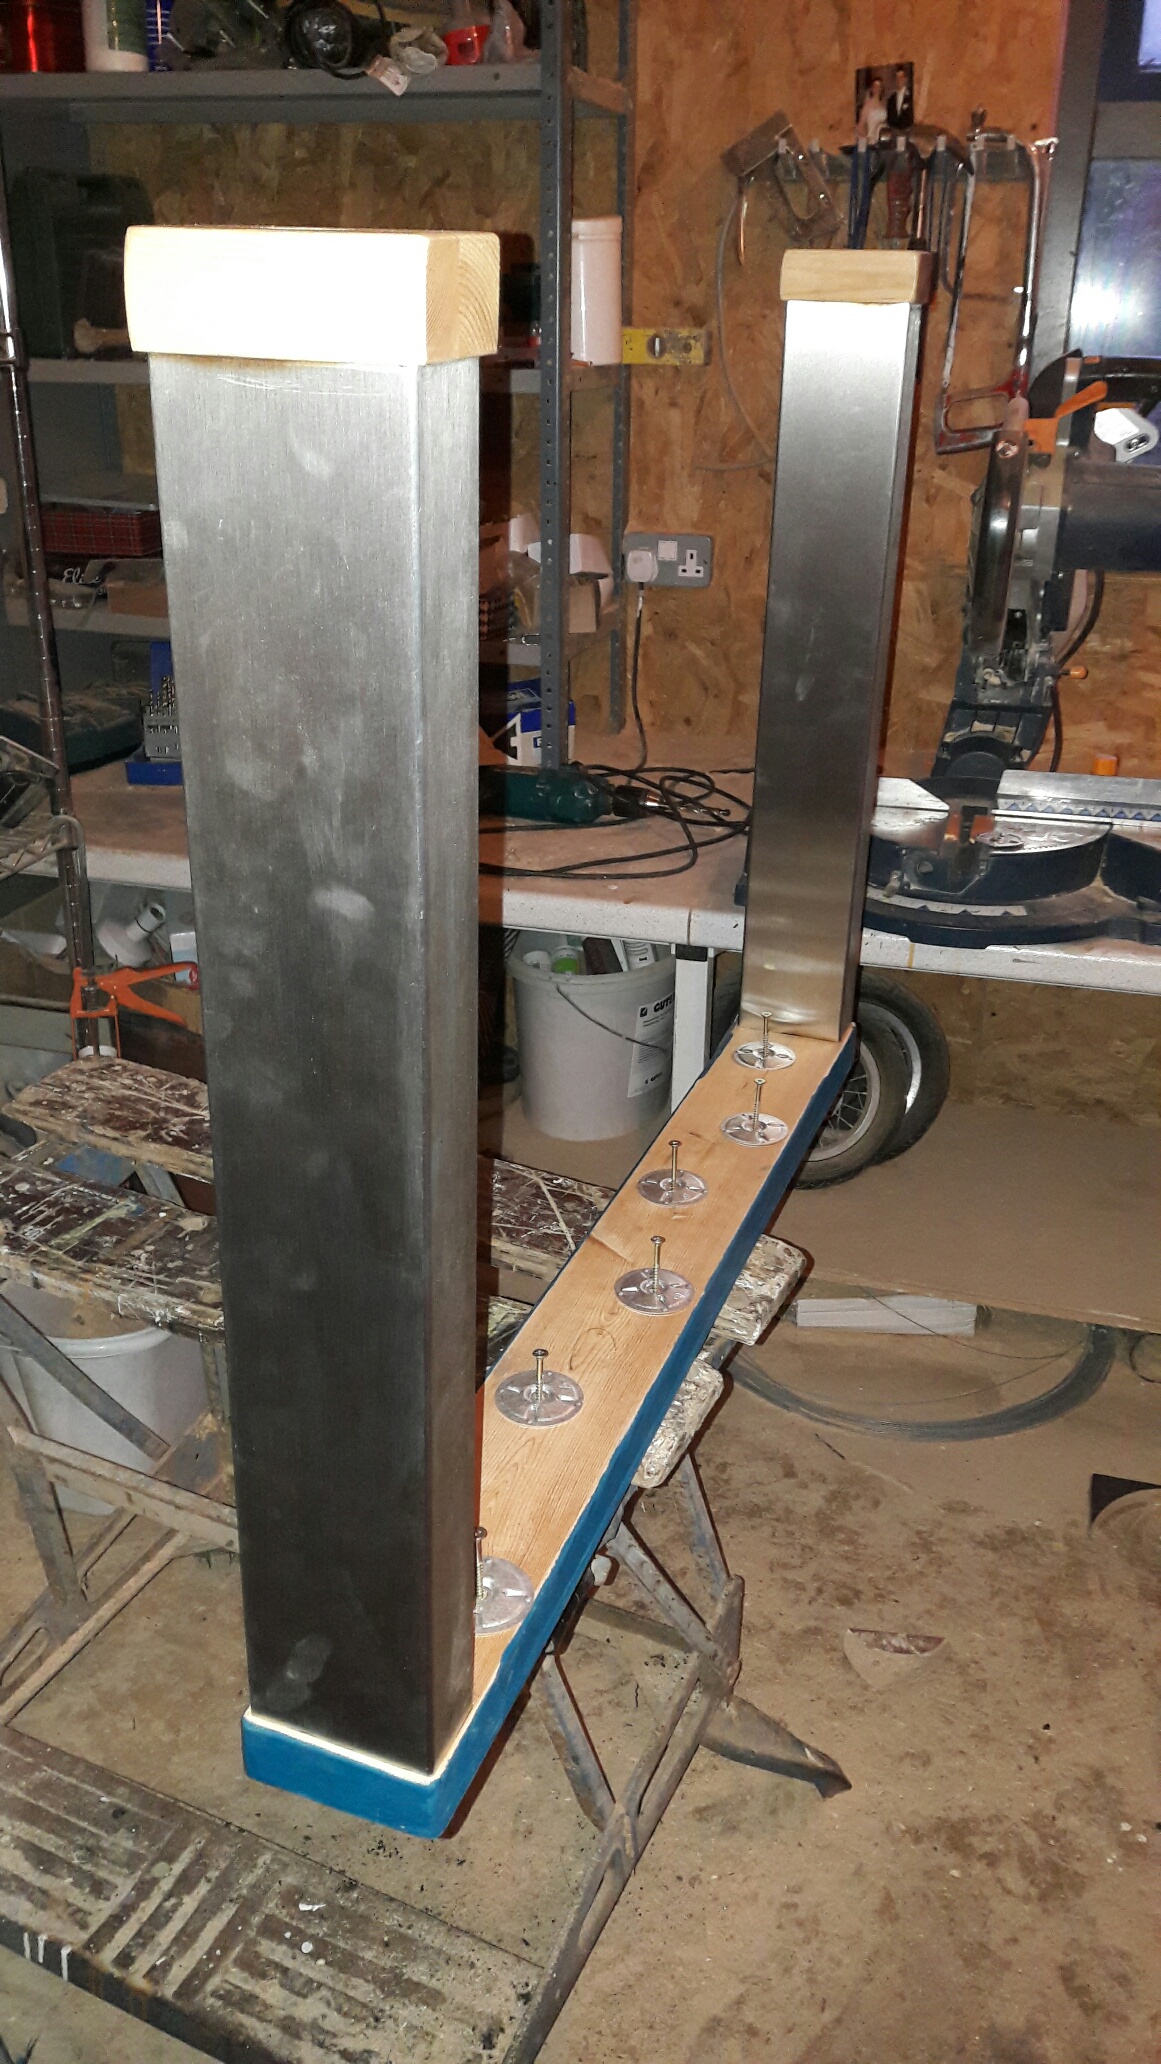 bolted together to the 38mm thick cross-piece to make a very rigid pair of legs for each end. Each nut is recessed into the timber and sits on a thick steel washer to ensure they don’t pull into the timber when tightened.
This box stainless steel isn’t cheap and is also difficult to cut accurately without the correct equipment. As I learned, a proper metal chop saw is really needed for this kind of work and hand cutting with a grinder will never give very square cuts. Having looked around for a chop-saw, I found I could rent one for 40 euros including an abrasive blade, but being a bit over budget already I opted to make a jig to hold my 9inch grinder for consistent and square cuts.
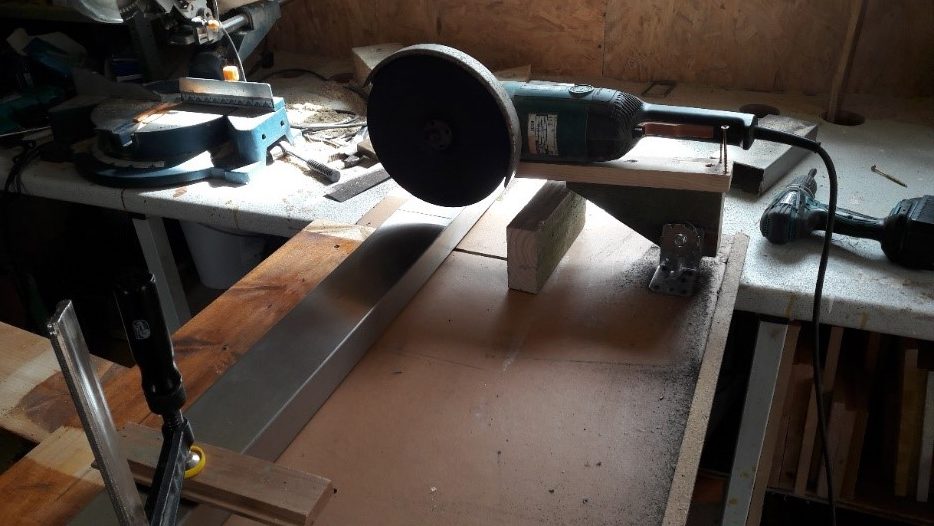 The image here shows the jig setup. It’s quite easy to rig together a jig, but not so easy to get it cutting squarely. Basic grinders such as the one shown here, are not precision tools, so the highly abrasive cutting action tends to make things move as the cut is happening. The results varied from excellent for the first few to reasonable for the worst effort. Still, the money was saved and the satisfaction gained.
A top quality metal chop saw will use a hardened steel disc as opposed to abrasive wheel and will give excellent cuts for a price. So far it’s not a tool I’m planning to get, but if one were serious about getting good quality cuts, then this is the solution.
The overall design of the table was to allow for a large extended table when we needed it, so the plan was to make two identical tops and 3 sets of legs. Two leg pairs would be attached normally to the primary top for general use, while an extension top could be added with a third leg pair by moving the middle pair to support both tops in the centre.
Each table top was cut to be 1100mm x 2000mm, which should easily sit 6 (2 at either side and one at each end), and when put together, could be used to seat at least 10 adults. The extension top is shown here being prepared with its multiple coats of paint.
Once the 3 sets of legs were made, the rest was easy. The table tops were sanded and corners rounded to make them stronger and more resilient to the beating they would have to take. We didn’t want the look of varnished wood on the tops and so we opted for dark teal-colour paint. The secret I was told, to a hard finish is lots of coats and lots of drying/setting time. The 6 coats of paint I ended up applying took a cumulative 5 weeks of drying time in order to feel somewhat hard. Any painted table top will wear/damage relatively quickly though and there is no prevention for this.
The first table is now in use so we’ll see how it lasts. The extension needs a little more paint setting time.
Note that the bench shown here was made from the timber offcuts from the table tops. Not much to it but will provide a little more detail on that in another post. 
