by wemakedo | Jul 27, 2017 | garden, Uncategorized |
We were delighted to finally finish our poly-tunnel in early June, just in time to transplant a batch of 20 tomato plants from pots into their new home, before they started wilting in their pots.
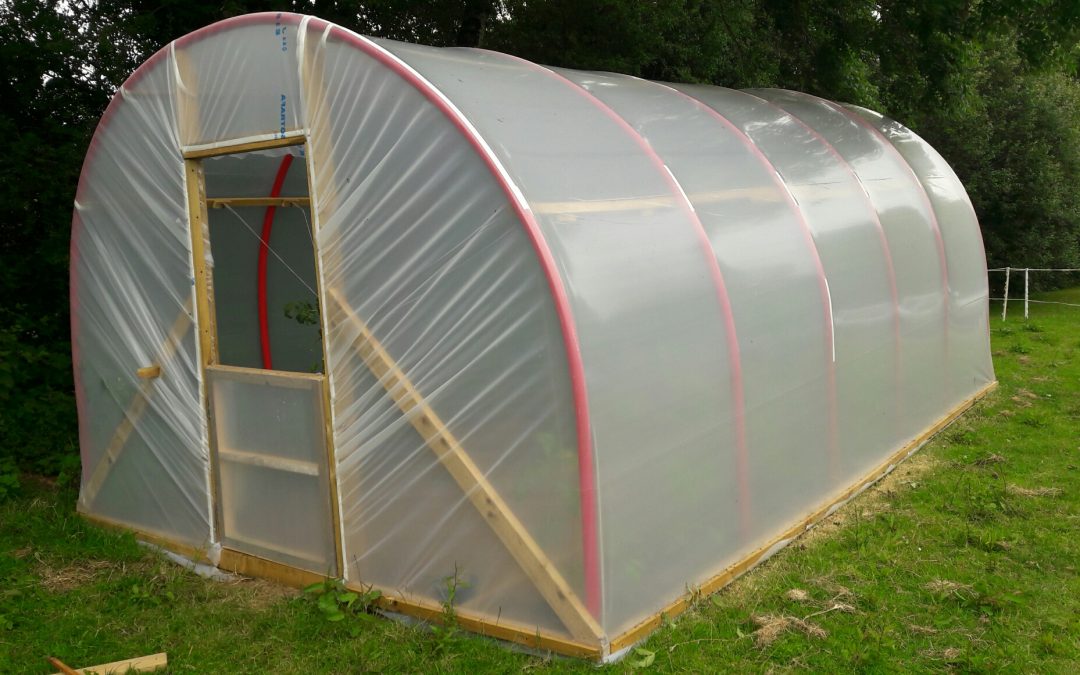
The plastic (polythene) cover proved to be quite easy to attach to the frame to complete the structure. (OMG! – did we just blow our whole year’s household efforts to avoid plastic – out of the water!! – we did think about this…)
The secret is to stretch it across the length of the tunnel first (from door to door) and then stretch it from side to side moving from one side to the same position on the other side to pull it taut in between. We used 2×1 sections screwed into the base boards to fix the polyethene in place. One person pulling to apply tension and the other person fixing. This process worked well with two of us helping, and we had the cover fitted in a half a day. Note also that it’s best done on a sunny day with no wind. The sun will warm the plastic and make it easier to stretch fully. This ensures it stays tight during hot weather times. The heat tape applied to the supports did make it easier to pull and stretch the plastic without risking any damage where it came into contact with rough timber. So although it may not be necessary to prevent burning of the plastic during its lifetime as it’s not in contact with any material that will heat-up, it did seem worthwhile just as a smooth contact surface in certain locations.
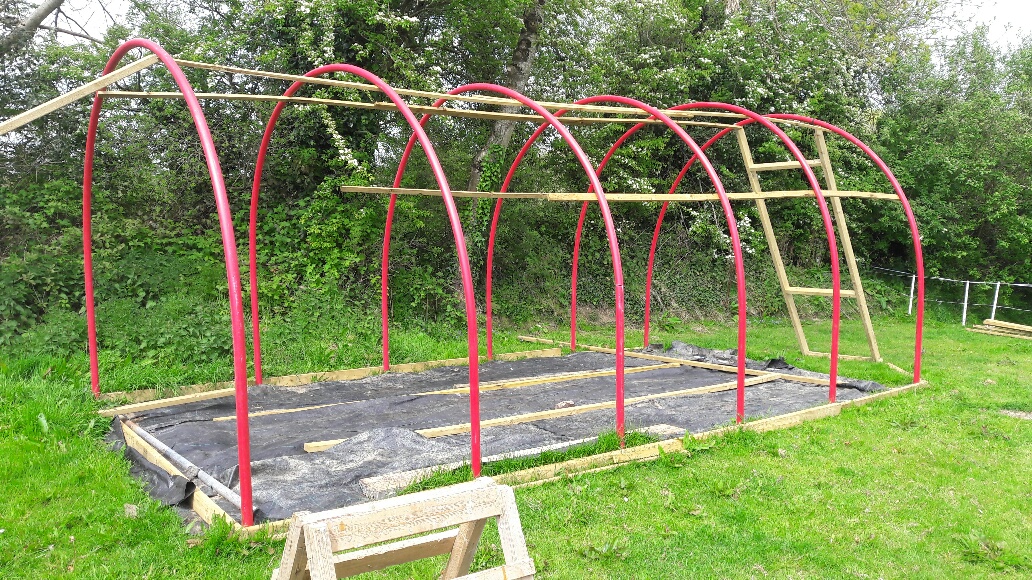
 We opted to go with a half door at the front (lower half can be seen in the picture shown) so the top half can be left open for ventilation, while the other end has a large, (as yet open) vent. We figured that as much ventilation as possible is best for now until the weather turns bad again, so we haven’t finished those openings off yet.
All in all, it was quite manageable and we are happy with our cost estimate of about half the price to build it as to buy a kit, although that doesn’t account for the time cost in putting it together which was significant.
Once the shell was finished, we used remaining 2×4” lengths to lay out the beds inside. We opted for 2 foot wide beds at the sides where access was restricted to one side, while a 3-foot wide centre bed left two sufficiently wide 2 foot paths running the length of the space. A little extra room was also left around the door for an eventual work surface or just room to “potter”. We had hoped to also include space for the kids as this may turn into a nice winter-time sheltered play area for them to get out of the house. That’s another day’s work though.
We have yet to figure out a good water supply and are opting to run a long hose from our house supply over to it for now. Eventually, we plan to collect the rainwater from the tunnel itself to use inside for plant watering. It seems this can be done easily using a stuck-on strip of plastic to guide the water off the wall a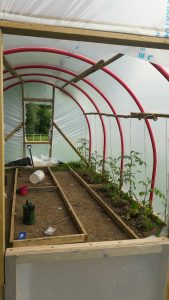 nd in
nd in to a butt. We plan to look into this further.
An interesting side note at this point is that our tunnel happens to be right beside where our deep water well (200ft) is located. So in effect, we are pumping water out of the ground, sending it into the house, through it, back out again and over to our polytunnel next to the water source. In the spirit of self-sufficiency which we are all about, we did some investigation into manual well-pumps.
We have semi-regularly been caught out without power for hours at a time. While it’s never been anything more than a few hours, still it can be quite an inconvenience if it goes beyond this, with water supply being the first problem we would encounter as we use a pressurised system.
Being self-reliant for our water supply, it’s nice to know where our water comes from and to know its quality to some degree, but we are entirely dependent on our electricity supply to access the water we need. So, what about a major disruption of power in the event of a serious storm?
It seems that photo-voltaic powered pumps are not powerful enough to lift water from such a depth, but there are manual pumps which can do this. Interestingly the major suppliers of these seem to be US based as there is quite a market there for off-grid survival enthusiast equipment. There just don’t seem to be the same options available closer to home. Perhaps we are too trusting of our service providers over here?
One example is the Bison Deep well pump which is a very expensive option but appears to be very well made and capable for such deep wells. ANother example is shown here. These pumps are about $1500 to $2000, but are well engineered and made to last. We haven’t done anything about this yet, but the idea of being able to hand- pump water for our polytunnel and for our home in the case of emergency is appealing. We don’t want to go too “survivalist” on you, but one just never knows. We all tend to be too accustomed to our comforts to really give any thought as to how we could manage in emergency situations, which can and do happen in various parts of the world.
Shortly after we finished and were admiring our work, someone accidentally had a run in with the side of the tunnel leaving a large gash in the polythene. This was, of course, always going to happen at some point, but within days of completing it! anyway, make sure to get some of the polythene repair tape sold by polytunnel suppliers for repairing the holes. It seems to work reasonably well.
Now, all we need is the sun to get our tomato crop blooming.
by wemakedo | Jun 29, 2017 | Plastic Free July, reuse, Uncategorized |
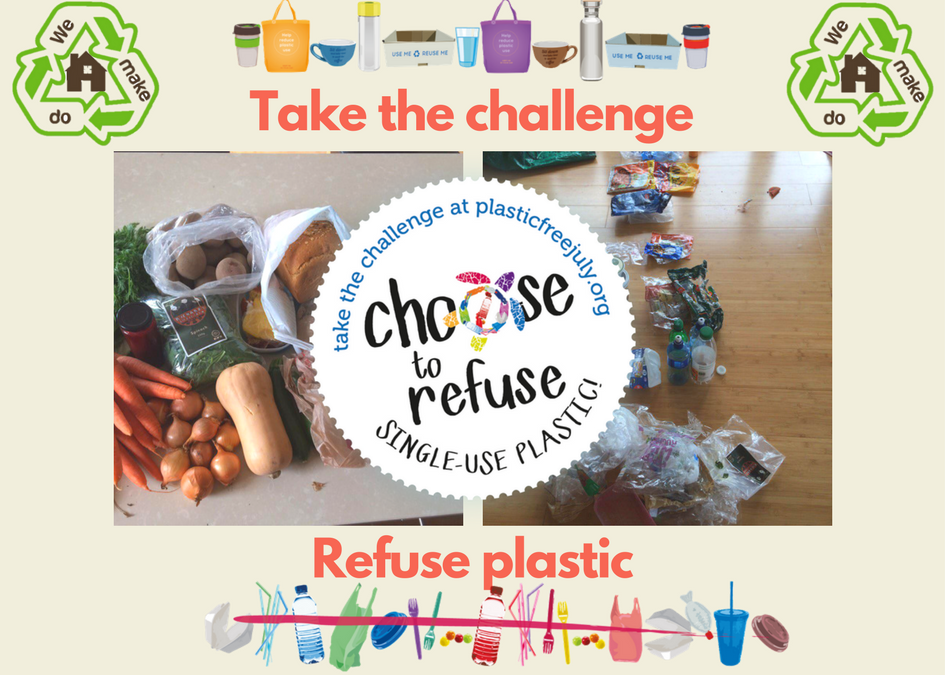
It’s been a year since we dabbled in Plastic Free July 2016 and now it’s upon us again.We’re happy to say that we have more enthusiasm to try it out again this year and are already well positioned in that many of our plastic-free habits have stayed with us since last year.
The biggest difference for us this year has been in going with a local fruit and veg seller who manages to remove all the packaging from his produce and will deliver to our home weekly. The other change we made is that we can purchase from a wholesale bulk foods distributor based in Macroom (http://www.iihealthfoods.com/) who carries everything you could want in large quantities.
For our first trial run, we bought:
25Kg of porridge oats (in a paper sack), 25Kg of puy lentils, 25Kg of red lentils, 25Kg or brown rice, 20kg of raisins
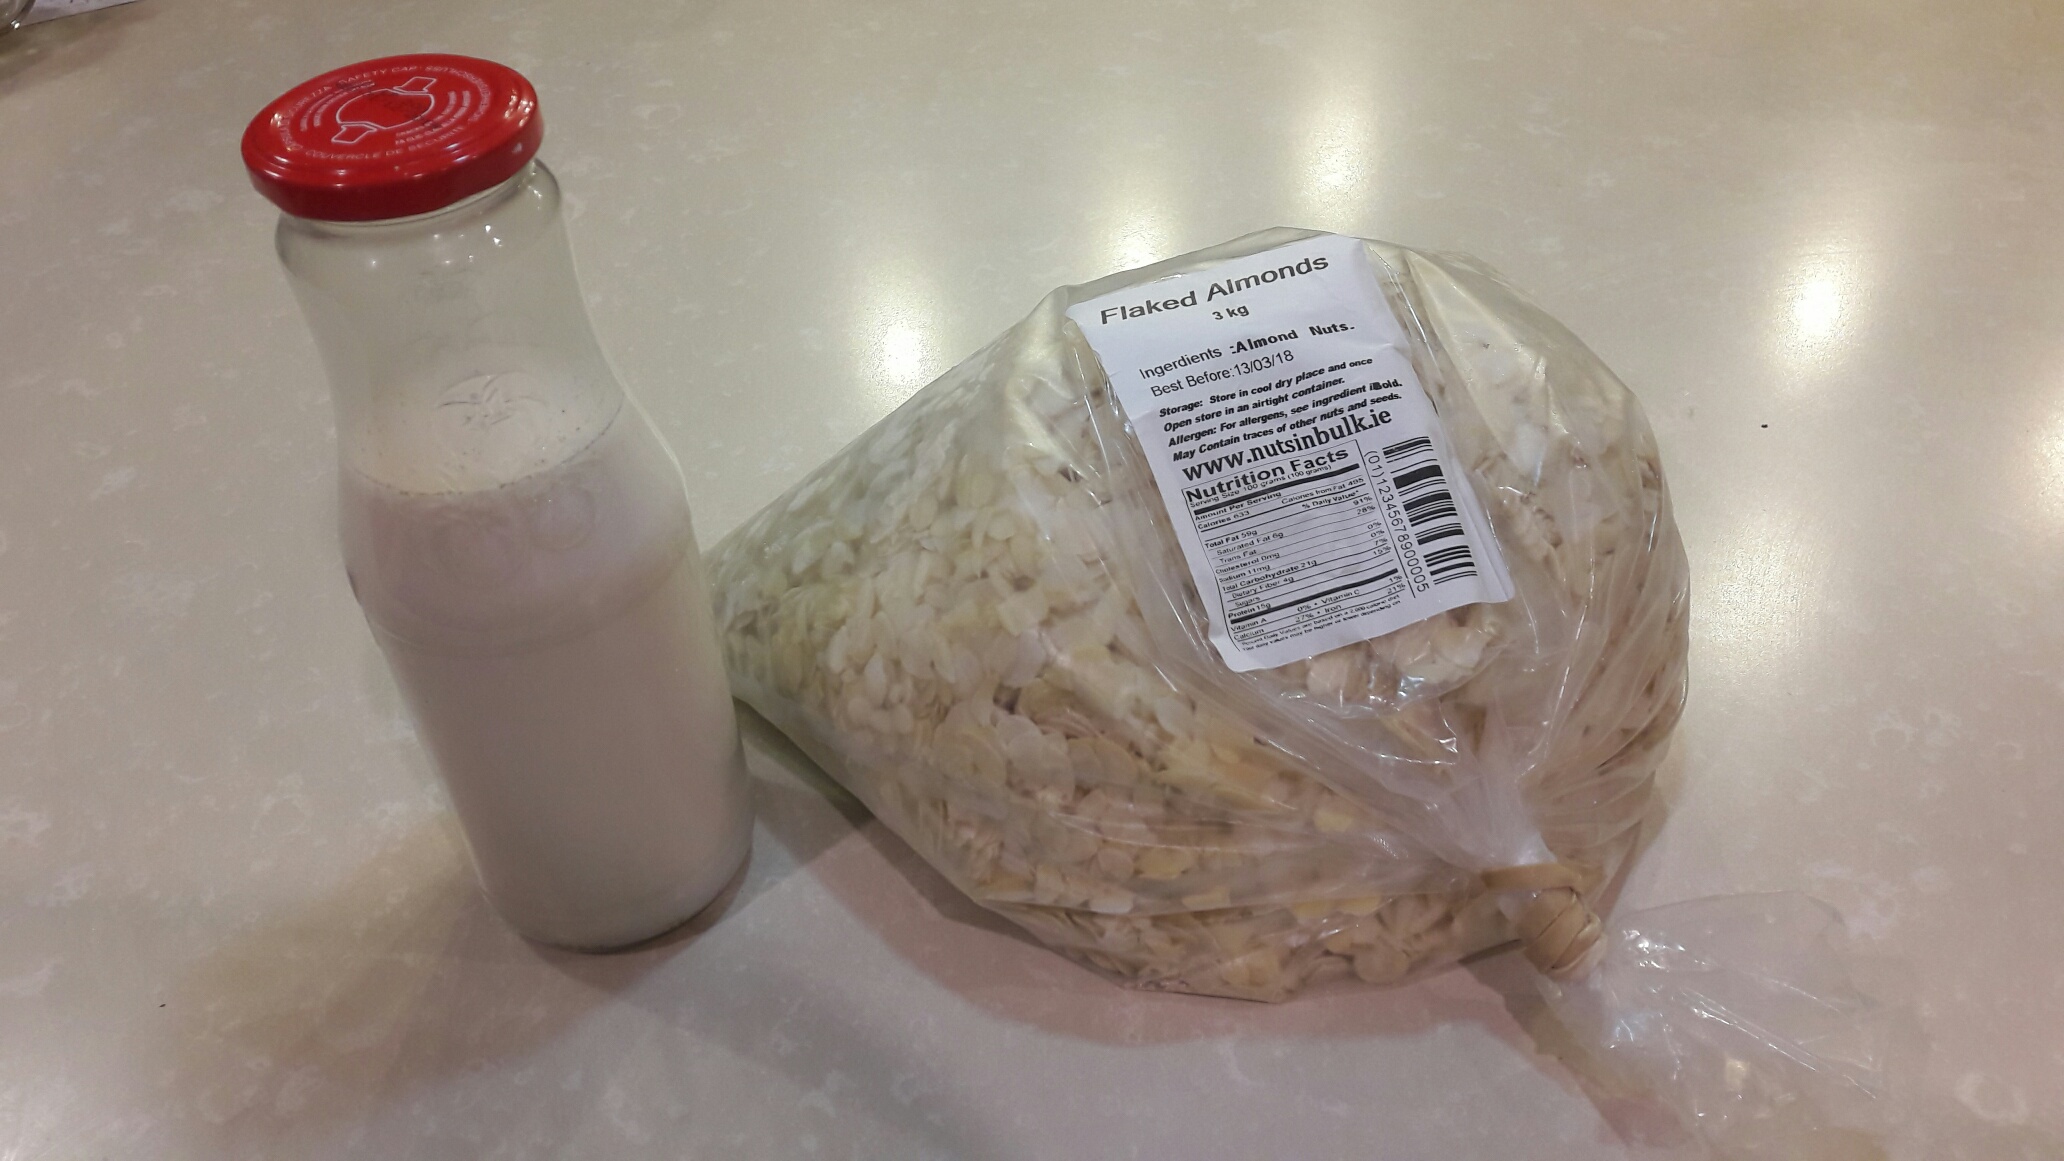
This is just an experiment to see how well the stuff holds and how long it lasts. In some cases, the cost savings are not much, but the reduced packaging and time spent purchasing seem well worth the effort. We are also still buying bulk nuts from www.nutsinbulk.ie, although haven’t convinced those guys to try removing the plastic from their supplies.
Sigh…only to have a bulk food store locally…we think this would really work as a business, but so far it hasn’t happened yet as far as we know.
This year rather than just try harder to keep the single-use plastic out of the house, we are setting a couple of specific goals for ourselves during the month.
- Get self-sufficient on milk alternatives
- Find other options for laundry detergent and toothpaste
As we have moved away mostly but not completely from cow’s milk, for health reasons, we have started buying more and more of the expensive non-dairy options, such as soya milk, almond milk, coconut milk, rice milk, oat milk, and my personal favorite, a coconut and almond milk blend. Lots of options to choose from and they are quite expensive to buy (€2 to €2.6 per litre), not to mention all the tetra packaging that goes with them.
What’s more shocking about these milk alternatives, is that many of them use minuscule amounts of the main ingredient (2-5%!!) and most of what you are buying is water with some sweetener and stabilizers added. Once you spot this on the pack ingredients, the idea of making you own is a lot more palatable.
And none of them are hard to make, although they can be a little time consuming. But in each case we’ve tried so far, they taste better than the store-bought options.
We opted for an easy start with coconut milk. Our first experiment used a can of light coconut milk we happened to have. One recipe looked particularly simple and called for just diluting a can with 2 cans of water and adding salt and vanilla flavoring to taste. It was quite palatable – certainly no worse than the market bought versions. The preferred method for this is to soak shredded coconut, rather than starting with the canned milk, which tends to have water and other stuff added to start with.
 Then we tried almond milk – letting a cup of almonds sit for 2 days in the fridge in water to allow them to soak and release an acid that is best removed. Then they were drained and rinsed, fresh water was added (2 cups for 1 cup of nuts) and blended at high speed. Some sweeteners of choice can be added to flavor, such as honey, vanilla or even dates blended in. This one worked really well and got the thumbs up from the kids.
The coconut milk didn’t get much support, but then neither did the shop bought stuff either.
Rice milk is a little more time consuming to make. It requires you to boil the rice in advance and then use the rice to blend with water. Then add vanilla or cinnamon to taste as usual. Not that hard and quite tasty too.
For now we’re going with almond milk in quantity to see if we can get into the habit of making do with it. Apparently it should last for a few days in the fridge, so reasonably sized batches will work
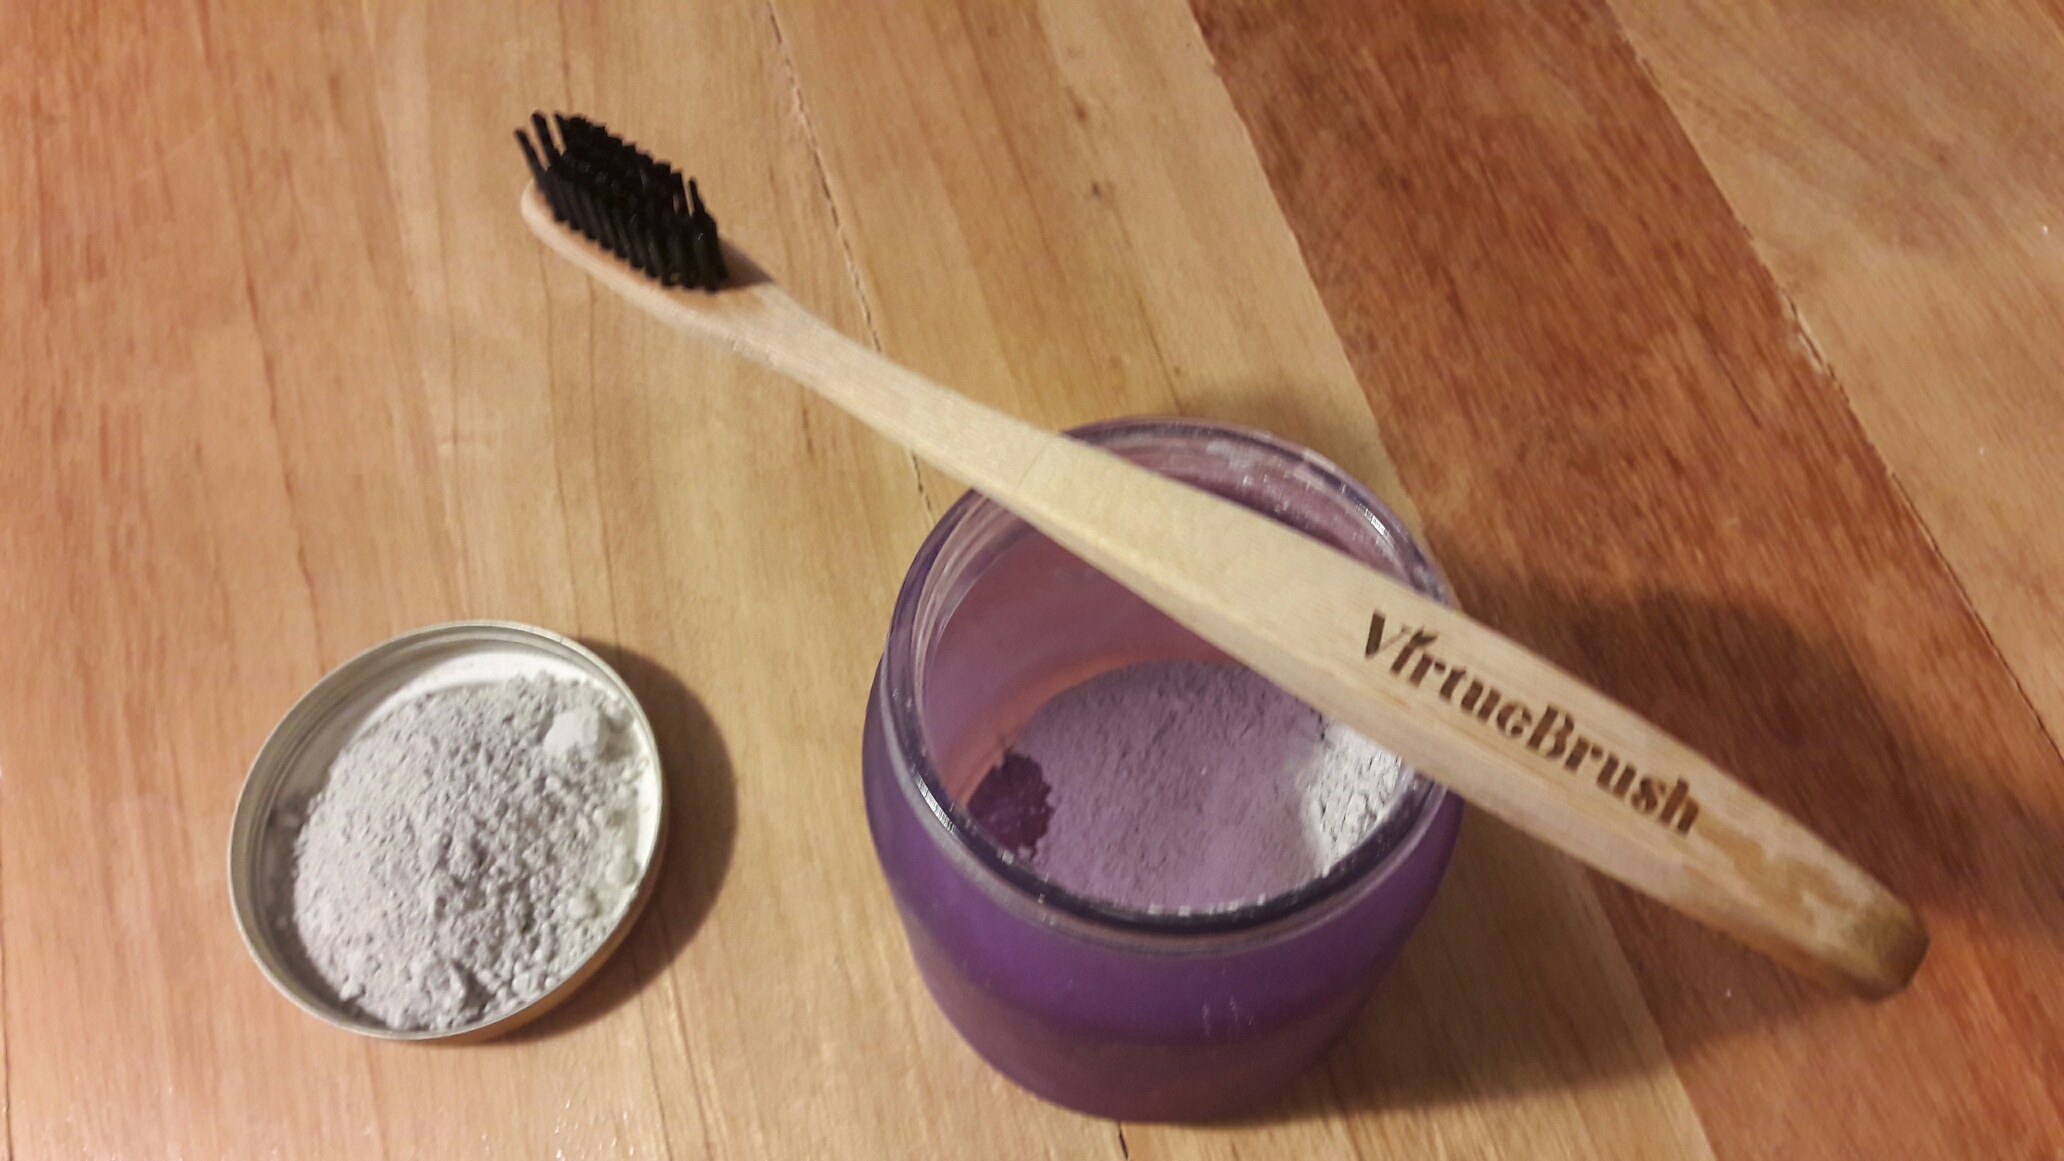
For our #2 goal this time round, we recently attended a “Zero Waste” event in Dublin and managed to source some options for laundry detergent and toothpaste. The detergent is apparently condensed soap shavings which can be used to dilute into detergent of varying strength. Rather ambitiously, the two jars (reused also) we bought should apparently last for a year. We’re a little skeptical but getting ready to try it out.
For the toothpaste, we bought some dry powdery “stuff” – a sort of clay with all sorts of healthy things added in apparently. I think its Bentonite clay – at least I hope it is – which has excellent absorbing properties, presumably absorbing stuff that you don’t want on your teeth. The idea is to add a little powder to the wet toothbrush and the particles of clay will do the cleaning job as you scrub without damaging tooth enamel. The other natural ingredients serve to fight bacteria. So far we have noticed that one’s teeth do feel very clean after using it, but I for one miss that minty fresh taste you get from standard pastes. The jury is still out on this stuff for now – one for and one against.
So we have mostly removed the plastic from our food supplies by now, but WOW does it spread around the house through other means when you’re not paying attention! Having children makes this so much harder as much of what seems to come their way is made of plastic and has a very short lifespan.
Also, changing topics, our Poly-tunnel is finally up and running now so we’ll let you know how that’s working out in the next update.
by wemakedo | Jun 2, 2017 | Uncategorized |
No self-respecting self sufficiency enthusiast should be without a polytunnel for some amped up veggie growing. Being able to produce your own veggies at home brings satisfaction for all sorts of reasons: providing for your family, true organic food, experimenting with stuff. This is assuming that one is able to get the stuff to grow. But that’s not our concern yet. Firstly we needed to build the tunnel and so we started some research into ways to make your own.
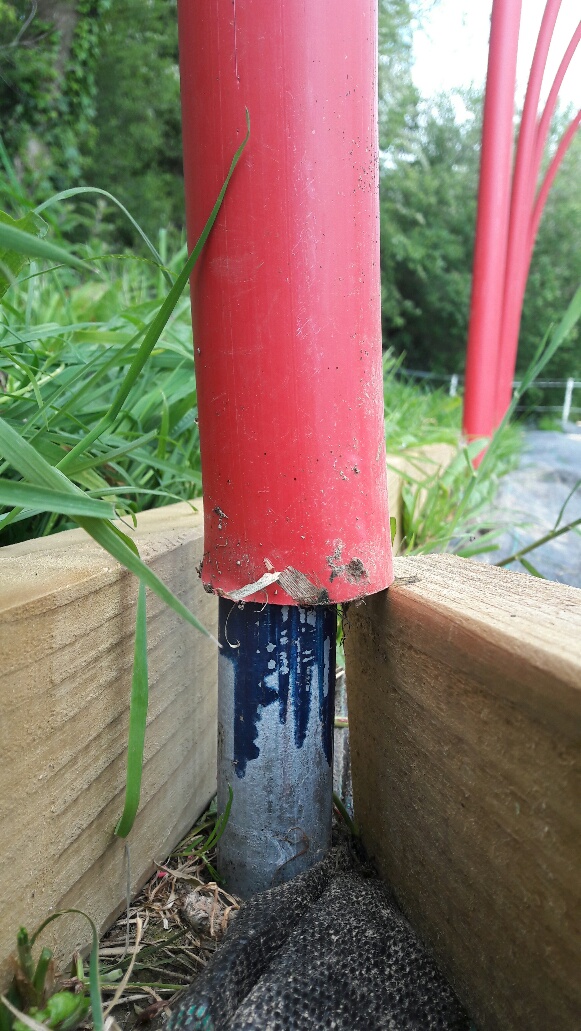
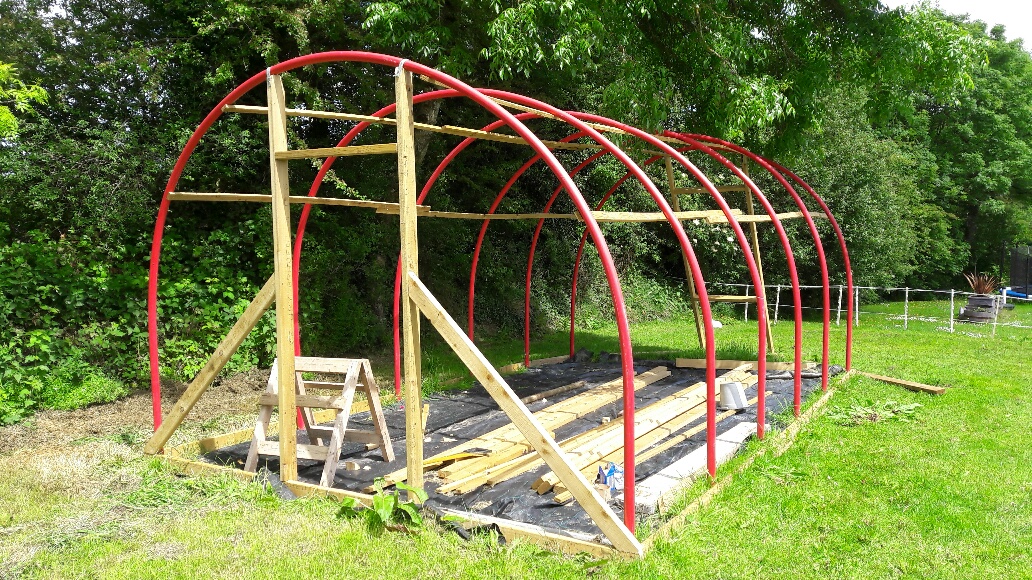
Having read through many diy descriptions, we opted to go for a design that uses polythene piping to make the arches. In the description we were following most closely, 2” diameter black polythene water pipe was used. For some reason we couldn’t source this so instead opted for ESB ducting, which comes in a nice 50m roll for about Euros80, and is widely available. Next up we needed some steel pipe that would be hammered into the ground to act as anchor points for the poly pipe arches. This steel pipe needs to fit inside the poly pipe. So we used 1” galvanised pipe which although it didn’t give a snug fit with the ducting, the result was still secure once the ducting was pushed down over the 3ft or so of steel above ground. We had hoped to make 7 arches at 4ft spacing, giving a 24ft long tunnel, but measuring the coiled ducting accurately proved to be difficult and so when it came to the last arch, we were short. So we have 6 arches at 4ft spacing for a 20ft long tunnel. The 7.5 meter arch span gave us an 11ft wide tunnel with a good high headspace (8.5ft).That’s still a lot of room for veggies (if they grow)! You’ll notice the sloping end wall at one end. That was simply an effort to add a little more floor area inside without the additional arch.
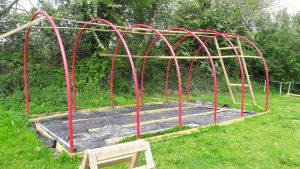

We visited some neighbors who are polytunnel pro’s to get their advice and experience.It seems that good ventilation is very important to get right. we were told It can be helped by ensuring you have a tall tunnel (with openings at either end). Hence the 8.5 ft height. The plan was to have a regular half door at one end, top half to be left open as a vent. While the other end was to have a tiltable vent or similar area. You can see the size of this vent are in the lower end in the images above. Hopefully this would be enough.
Next we went with some 4×2 pressure treated timber to use for the base rail to which the polythene would be attached as well as for the end structures to form the door and vents. Some 2×1 lengths were used to link the arches together and add rigidity to the structure. It seems that used scaffold boards are a nice and cheap way to do the base rail and provide a large area to attach the polythene too, but try as we could we weren’t able to find a local source at a reasonable price. It seems that many people are finding many uses for the surplus of scaffold boards that used to be around, and so they are now becoming a much sought after commodity for diy projects. An alternate design to the use of timber baserails, is to dig a trench all around the tunnel and bury the end of the polythene under a 1ft depth of soil. With the recent dry weather we’d been having, we figured this would be back breaking so at additional expense and less ideally we went with new 4×2 lengths.
While the structure was still being built….it is taking a while as there seems to be so much other stuff going on now with the fine summer weather…we ordered the polythene cover online from this company (www.polytunnelsdirect.ie).
An 11m by 8.75m section of 800g material we were told would be ample for our needs. We also ordered some heat tape, which is recommended for areas where the polythene touches metal or anything rough. The metal will get hot and damage the integrity of the polythene over time while any rough areas will obviously cause risk of tearing.The order arrived within a few days and is sitting waiting…

Our materials costs were as follows:
Steel pipe sections to hold up red pipe arches = €60
red ducting :€88
Timber (4x2s (10) + 2x1s (10)) = €140
polythene + heat tape = €170
total = €460;
Its a little more than I had expected for such a structure. While we are estimating that an equivalent kit purchased and delivered would cost at least twice that amount which is somewhat consoling, the labour time involved in building this so far has been significant. However there is plenty of satisfaction in taking on projects such as this yourself if you have the time to spend on it, so factoring in financial and time costs, is it still worth it?
Absolutely!
We hope to have at least the structure completed by the next blog update, even if the growing hasn’t kicked off. There is a healthy crop of tomatoes sitting in pots waiting for their new home and a chance to thrive in our new tunnel so time is becoming of the essence. We are a little late for this years growing season, but hope to get some growing use from the tunnel this year.
by wemakedo | Sep 10, 2016 | Uncategorized |
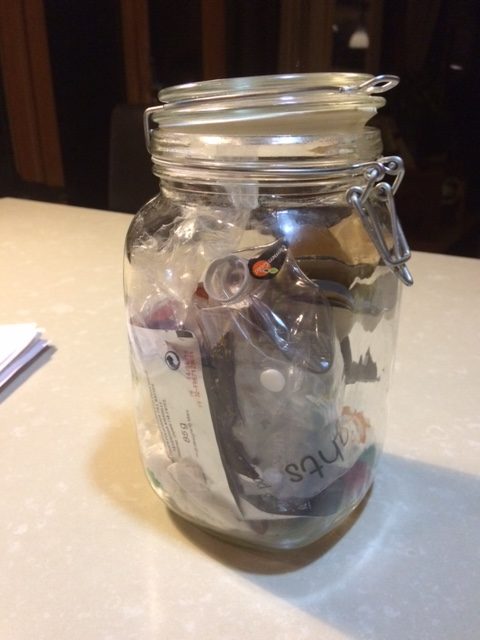
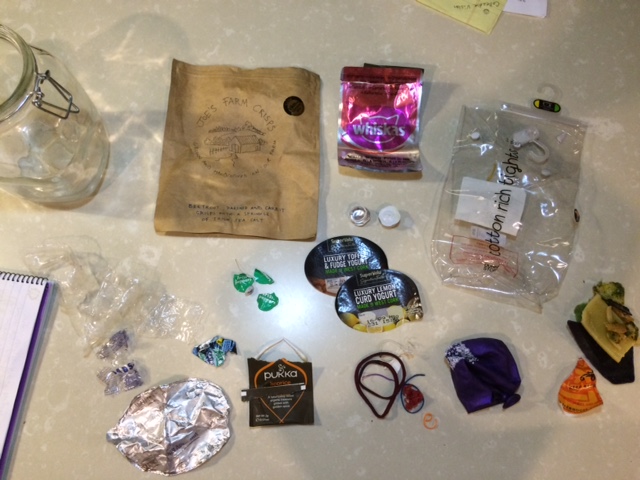
Here is how things were looking by Wednesday: 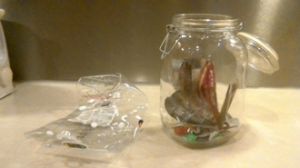 The jar was filling up but plenty of room left for the rest of the week. In the picture there is a large plastic wrapper from a set of school tights for our eldest girl. It was a spur of the moment purchase, one of those situations when we thought that avoiding plastic had to come second to getting the tights bought. I hadn’t bought tights in about 3 years, always waiting for hand me downs. I should have just sent her to school in socks for another week until I could have sourced some. There’s a plastic cat food pouch from a pack purchased ages ago (before we cared) – this will be avoided in the future by using canned meat and boxed nuts. Some fancy cheese we got as a gift had an inedible rind (we tried!!) so in that went too. All in all, we figured things were going fine.
 By the end of the week, we were delighted to see that we still hadn’t filled the glass jar. We found that we were taking a bit more liberty in what went into the composter (veg fried in oil??) and the hens were getting force fed potato skins and leftover toast that had a bit of jam on. The cat was given an extra day to finish the salmon skins. And mommy-eat-anything, the human garbage dump, ate any other scraps that would normally go in the bin.
Here’s the overview of our junk for the week, and how we hope to eliminate each of the items:
Crisp bag from Joe’s Farm Crisps: The package is made from repurposed coffee bean bags, which is how I justified this yummy purchase. It is still my rubbish though. Not sure what to do with it. Maybe this will be an every other week indulgence..
Cat Food bag and School Tights bag: See above. Tin cans for the cat from now on, along with Whiskas cardboard boxed cat nuts. And the new tights… what was I thinking! This was a good reminder that something might not be as essential to puchase on the spur of the moment as it seems.
Cheese Rind & Wax: We eat lots of cheese… I found some recipes using cheese rinds to make stock. The wax might be compostable. We should be able to find a use or a waste free disposal option for these.
Dishwasher tab wrappers: These were bought in bulk with a Groupon voucher before we were concerned about the packaging. We’ll use them up then source non-packaged dishwasher soap (like the old cardboard boxes of Cascade that we used to use in Alaska..)
Tea Bag Covers: We won’t be buying tea bags with wrappers on them anymore. In fact, we’ll aim to switch to loose tea from a shop in Cork.
Yogurt Pot Covers: Mr MakeDo loves his lemon custard yogurt. I started making homemade yogurt in July, and just this week figured out that adding lemon curd to homemade yogurt nearly replaces his favourite yogurt. So, these will be eliminated. We recycled the paper pots (hmmm, better check that’s allowed…)
Cream Cheese Cover: I made courgette cake, which had to have cream cheese icing on it. Indulgence. We do use the cream cheese pots for lunches, but we don’t need that many. Maybe I’ll look for a homemade recipe for cream cheese. For now, though, we’ll reduce the cream cheese purchases.
TetraPak pull tabs: We need to come up with a plan to reduce Tetrapak use. We’ll post here when we do!
Expired Hairbands and Rubber Bands: No idea what to do with these yet. Suggestions welcome!
Gum Wrappers: Gum is gross – our 5 year old needs to find something else to be obsessed with. It hopefully won’t appear again.
Fruit Sticky Labels: Shopping at the Farmer’s Markets will eliminate the fruit labels, while the fruit is in season. Not a huge amount of waste, but it all counts.
Salmon Skins (not pictured here): The cat ate most of them, but we’re going to see if we can bury them or chop them up finely and compost them. I’ll ask the fishmonger what he does with the skins. Or I might ask him to skin them for me.
We also found that we should get better about cutting off inedible parts of veg before cooking them, since cooked stuff isn’t desirable in the composter. For example, pull the kale leaves off the stalks before making kale chips.
Of course a week is short enough that plenty of purchases in packaging that last longer wouldn’t reach end of life, and so won’t appear in this test. One example of this is that the family got head lice this week (!!!) and my first thought was how much room the delousing shampoo bottle would take up in our glass jar! But luckily, we bought a 6 treatment bottle, and only needed to shampoo 4 of us. So the bottle didn’t need to be discarded, yet.
Our glass jar will remain on our kitchen countertop, and the rest of the household bins will stay stacked and put away. I suppose we should warn guests.
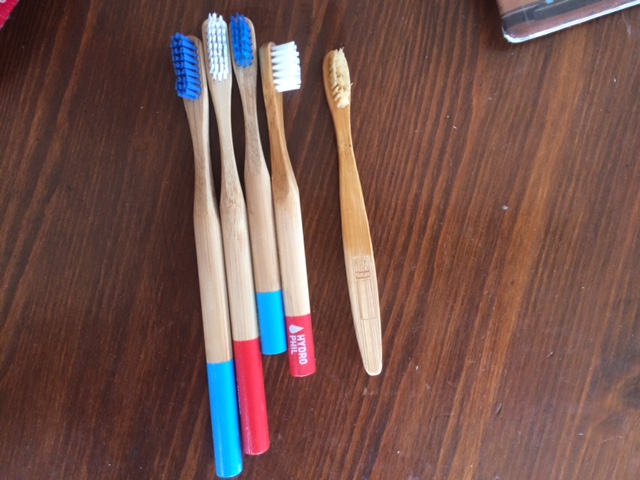
An interesting side-effect of this high degree of attention to our household waste is that we are becoming even more keenly aware of the clutter in our home that we don’t need to have around. And so Zero Waste Week seems to have triggered a de-clutter month also. Some time is being spent rounding up things that we don’t love or enjoy using so much as we come across them. We hope that as this stuff leaves, that it wont get replaced by other similar stuff now that we have become more sensitive to the effects of consuming. Many of these items were things we picked up in our premarried lives that we are just no longer attached to. Some were posted for sale online and the rest will be offered to our local charity shop. We did order a set of bamboo toothbrushes (Eccoe-Verde), which we love!
One other thing I’d like to mention is the use of reusable feminine products. Once you start using these, you’ll wonder why you never did before. They save a huge amount of money, and the cups are safer for you too by eliminating the risk of Toxic Shock Syndrome (TSS). Have a look at this gorgeous young lady, Lauren Singer, who’s a huge advocate, or here is a list of different alternatives for cups or pads.
I’d read about the joy that others experience as a result of minimizing, and I used to think it was a little bit corny. But, I have to admit to very much starting to feel that joy, as we move closer to having only the things we love and need. I’m already noticing more free time now that we spend less time cleaning up, throwing stuff away and taking out the rubbish.
If you want more motivation to reduce waste and minimize your stuff, have a look into Lauren Singer (mentioned above) or Bea Johnson, the queen of zero waste!
by wemakedo | Sep 5, 2016 | Uncategorized |
Having learned a lot from our experiences during plastic free July we intended to participate in the Zero waste week, starting Monday September 5th. Learning how to at least manage and control our use of single use plastics was an excellent starting point for attempting to lead the family towards trying to eliminate our household waste at least for a short period. Partaking in these organized waste efforts is a great way to coax everyone to pay attention to the problem and to play with ways to reduce. The kids are particularly interested in these experiments and love to get involved in the process.
Our plan of attack for the week will revolve around:
- Focus in particular on food waste, and reusing leftovers; for leftovers that we don’t use:
- Composting
- Expanding the diet of our trusty hens who are keen to eat almost anything we have tried on them that doesn’t go in the composter.
- Cat for any fish scraps we have (being a no meat household removes that issue for us)
- Zero plastic shopping – of course.
- These first few deal with the kitchen waste which for us is easily the biggest source of daily waste
 generation.
- Re-useable nappies all the way for our two kids who still need them
- No unnecessary purchasing which involves packaging of any kind.
Shown is a picture of our temporary bin which will have pride of place on our kitchen counter for the week, where everyone can see it and monitor our progress. We took the precautions of emptying and hiding all other bins in the house to start the week so we can clearly see what is being generated during the week. A leftover croissant was waiting for hen-breakfast but was later grabbed for a bedtime snack.
As with the plastic free effort, the goal here is not so much to minimise the waste but more to examine what we generate alot of and to look for alternatives. Zero waste feels like an unattainable goal but as many bloggers have demonstrated, it is a practical target to aim for and we can all make some changes to move in that direction at least.
With our family of 5, we needed to put a little more thought into preparing for areas such as nappies, school lunches and grocery shopping, but as our previous experience showed us, plastic was the issue for groceries and we found that our plastic free habits have stayed with us and it has become second nature now to just avoid plastic packaged foods. This has meant we now only shop at farmers markets and SuperValu, as well as the English Market in Cork.
Composting is also something that we have done for many years now and if you have the space in your garden it is an excellent way of reusing raw food scraps. We made our two bin composter from old pallets and a metal base from a kids cot, covered in roofing rubber membrane (leftover). We then lined it with plastic construction film (left over from our house build) to slow the breakdown of the wood. We fill one bin while the other full side breaks down, and have found that we can get good quality compost out from the full side in the time it takes us to fill the other bin. In August we emptied the latest batch of compost onto our veggie garden to help restore it.
So if you have the interest, join us for Zero waste week and learn more about what your household generates.

by wemakedo | Aug 21, 2016 | transport, Uncategorized |
Image courtesy of The Irish Times.
With the Euro / Sterling exchange rate recently becoming much more attractive for car buyers considering a UK import, we thought we’d describe our recent experience with this process for buying a car.
Our new arrival in November which brought the brood to three meant that we had to rethink our car situation. Neither of us care too much about the appearance or brand of car we drive but let’s face it, in rural Ireland one tends to spend a lot of time driving. So having a car that matches your needs makes moving the family around easier and maybe somewhat pleasant. Our VW Passat estate just wasn’t up to the job of managing three kids car seats easily. Having spent the winter in Alaska where our in-laws use MPVs, the obvious flexibility of these vehicles was compelling and as one gets older and busier with kids, one tends to look more at the practicality of things than the cosmetic appeal. We came home with the plan to upgrade (or downgrade depending on your view).
Figuring we’d save some cash, we opted to try to sell our own car first. So we cleaned it up, took some pretty pictures and posted our 2011 VW Passat estate online and watched the “views” roll in. Lots and lots of tyre kickers it seemed.
But no calls.
We dropped the price to try to spur the interest (14,500, down to 14,000).
Finally we had an interested person, the only interested person as it turned out, who came and viewed and bought. It only took about 6 weeks and we got 13,500 in the end. A decent price considering the advantage it gave us in making our next purchase.
For various reasons we had settled on a Peugeot 5008 7-seater as our replacement. Having bought a UK import before through a local dealer we decided to try this path again.
The exchange rate plays a big factor in whether this route is advantageous. At the time we started talking to a dealer about doing this, the Stlg/euro rate was at 1.27. Not a good exchange going by historic trends but surprisingly it was good enough to make a saving. The average UK car tends to be higher spec than the Irish equivalent and so the expectation is that you will get something at least nicer if not cheaper assuming the same year and mileage. For some it makes sense to travel to the UK, make the purchase and drive the car back to Ireland, sorting out the VRT payment along the way. We weren’t prepared to travel and so we opted for one of many dealers now who will offer this service for their own fees.
The appearance of online auction sites where buyers can get full bidding access has made this process much simpler than it used to be – both for dealers and private buyers it should be noted. In the two times we have been through this process, no one connected to the dealer was physically inspecting the car to ensure that it was good purchase. Instead the more reputable auction sites use a pre-check process that rates the cars according to their mechanical and cosmetic condition. Grade 1 is as new, and grade 3 is decent while a grade 5 might have warning lights showing or some serious bodywork issues. Apparently the dealers trust this assessment and rating enough to bid remotely on the car on your behalf. In other words they are not doing anything that you can’t do yourself except taking the logistical hassle out of the process. Also note that there is a fee for buying at these auctions which is related to how frequently you do it, and so a dealer will benefit here over the once-off buyer who pays more –for example 9.5% of the purchase price for a £10,000 value car was quoted on one site, which is significant.
One thing to beware of at this point: For a dealer who buys a car this way and then offers it to you with warranty cover, they are providing additional value on top of the car. Knowing that the car that was bought unseen will have a warranty with your local dealer certainly reduces the risk and brings some peace of mind. One dealer I bought from before did this but in this most recent case, the dealer has outsourced this to “Mapfre”, so for a discounted price I could buy a warranty from them for a year to cover the car. Apparently when you buy an extended warranty on a new car in Ireland It may be covered by this Spanish company based in ireland, so they are well established in this market.
The point for me though was that if I did buy this UK auction car myself and avoided having to pay a dealer to do it for me, then a concern was that I would not have a warranty, until I realized that I could buy one if I wanted. This makes the idea of doing this whole process myself quite feasible and with low risk.
Would I bother?
Certainly after going through this process and seeing how it works, and feeling that the dealer did little for his cut other than get the car shipped over to me and put through the VRT payment process, I would strongly consider it.
You get to pick your car, and importantly you get to bid yourself so you know exactly what you are willing to spend as the bidding is driving the price up during the auction. This avoids the difficulty of having to provide a bid limit to the dealer in advance without knowing if it will be enough for a successful outcome, only to find out later that you lost your ideal car to another bidder for the sake of another hundred quid.
Some useful links:
To transfer money from euros to sterling – I recommend avoiding banks and going with Transferwise a most excellent facility that charges the least for exchange transfers.
Of course we bought before “Brexit” happened, and so now the post- Brexit exchange rate being in your favour, makes this a most attractive option for those willing to put in the additional effort.

 We opted to go with a half door at the front (lower half can be seen in the picture shown) so the top half can be left open for ventilation, while the other end has a large, (as yet open) vent. We figured that as much ventilation as possible is best for now until the weather turns bad again, so we haven’t finished those openings off yet.
 nd in
nd in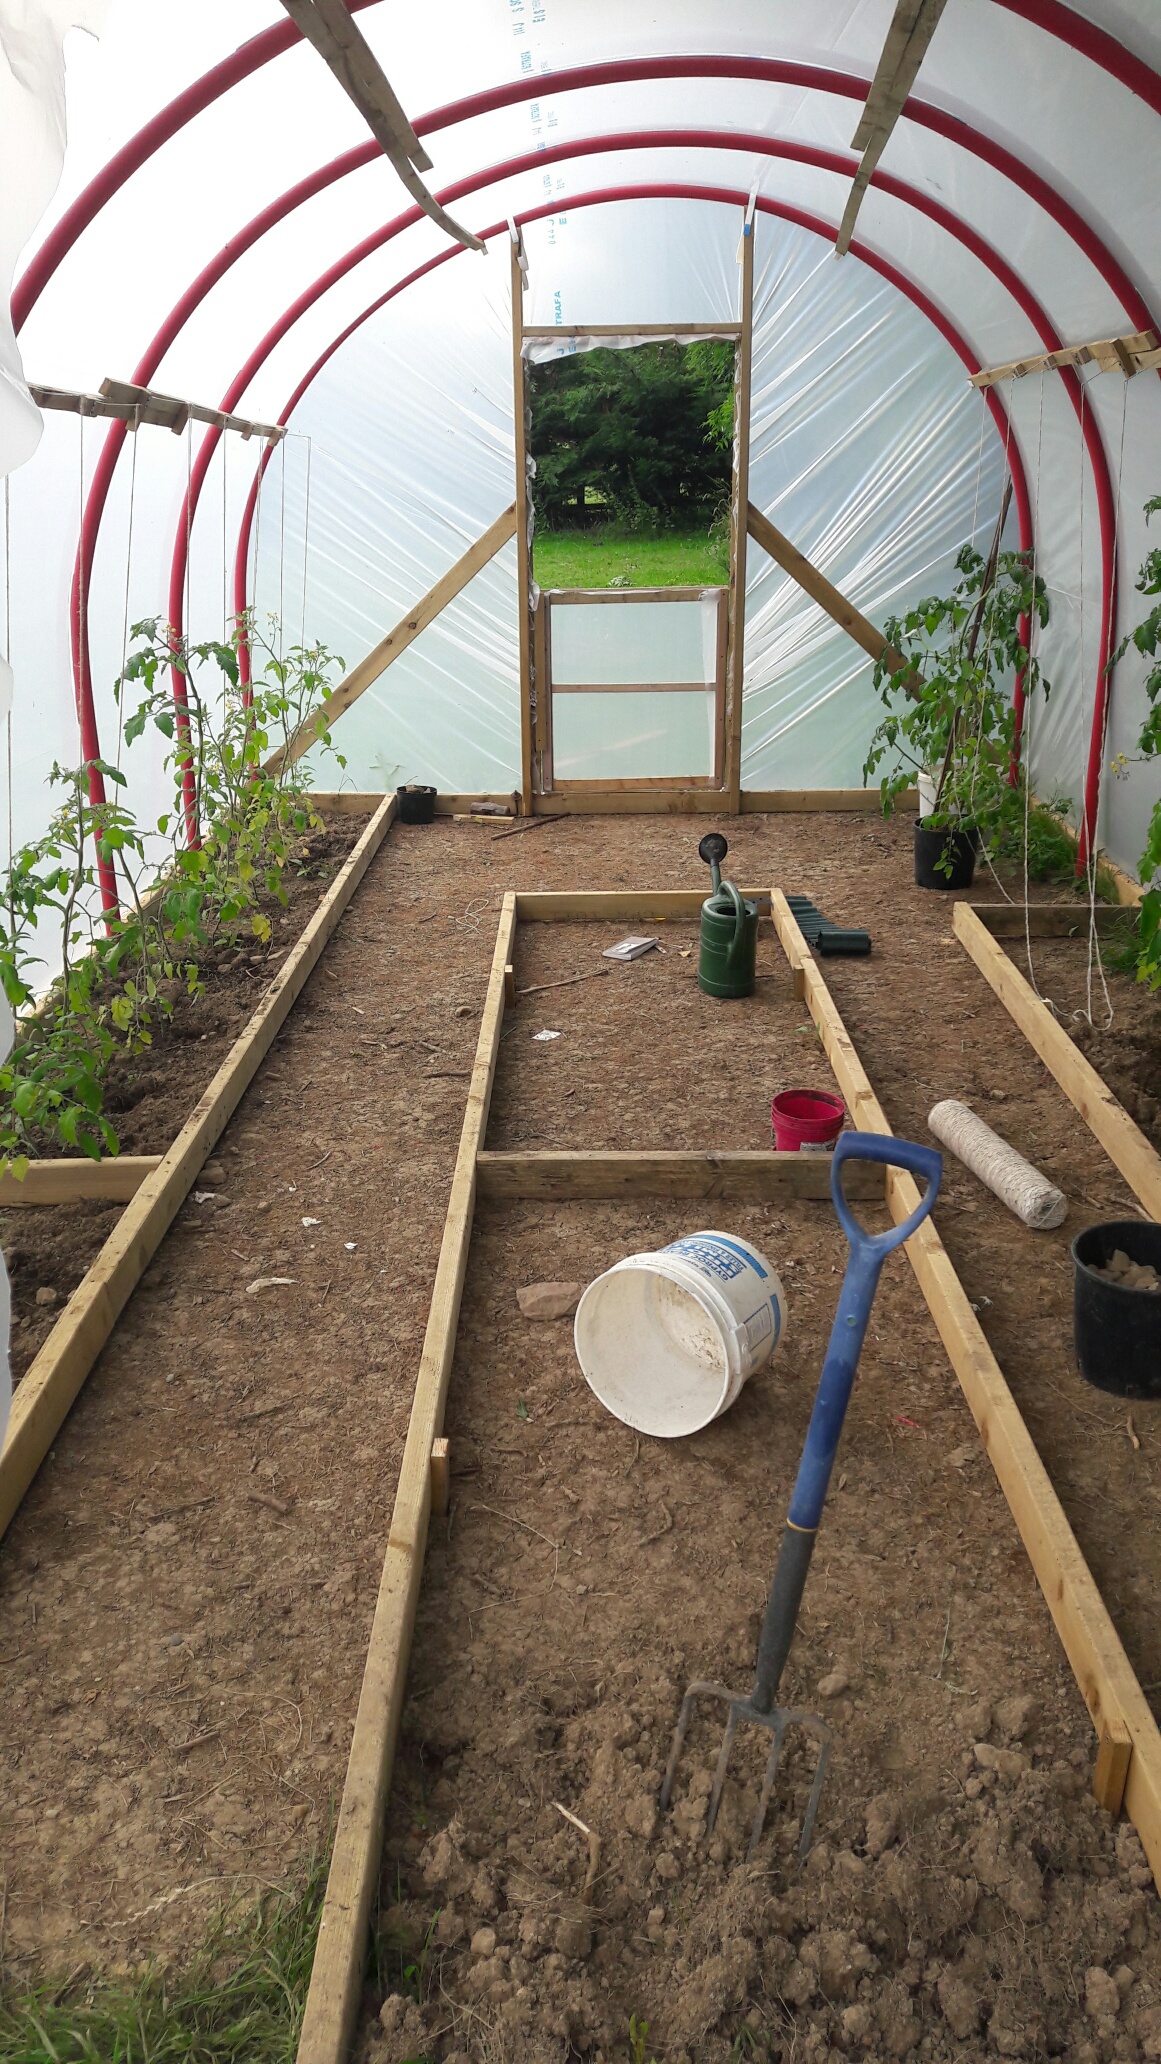 to a butt. We plan to look into this further.